In the previous article we used Stable Diffusion (SD) and ControlNet to transform a logo into a natural looking image.
But now, let’s push the boundaries even further. Imagine you have a picture, and you wish you could replace something in it with a different object. Enter Stable Diffusion once again!
There’s a special type of SD models known as inpainting models. They excel at not only fixing images but also enhance the images using the magic of Generative AI.
So, in this article, we’re going to explore the capabilities of Stable Diffusion Inpainting for image enhancement. We’ll learn how to use it to replace objects in images, giving your creativity a whole new canvas to work on.
Let’s dive in and discover the art of AI-powered image editing and enhancement together!
What is inpainting?
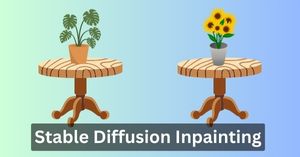
In the context of image generation, inpainting can be defined as using a stable diffusion model to generate certain selected parts of a given image. Refer the illustration below to get more clarity.

As you can see, the user first selects the region in the input image and then the stable diffusion inpainting model generates new pixels in that selected region based on the given prompt.
Create mask image
In Diffusers, instead of selecting the region in the input image, a new black & white image is created of same dimensions wherein the white region is the region-of-interest. This image is also known as mask image or mask.
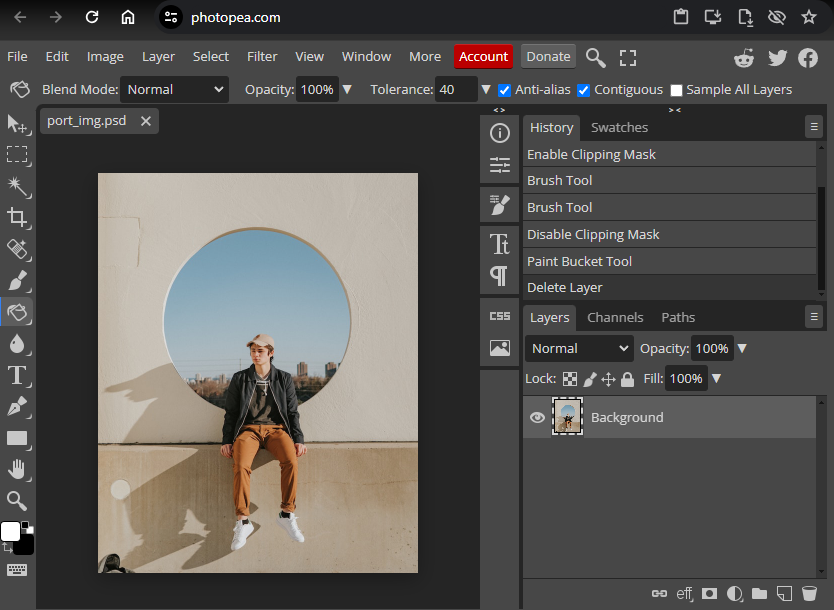
To create this mask image, we can use a photo editor like Photoshop or its online alternative Photopea.
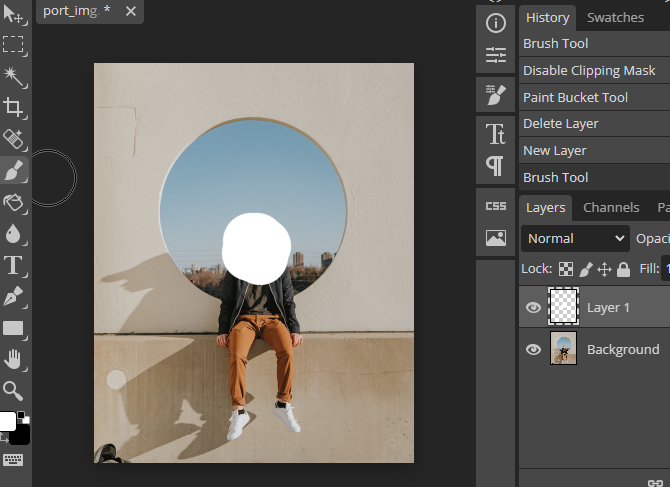
As you can see in the screenshot below, I have opened an image and I will select the region in this image that I want the SD model to regenerate.
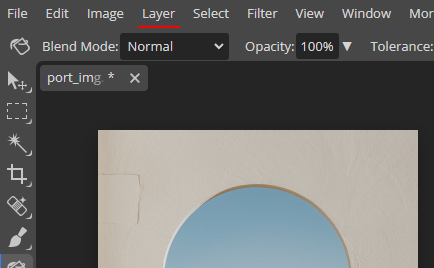
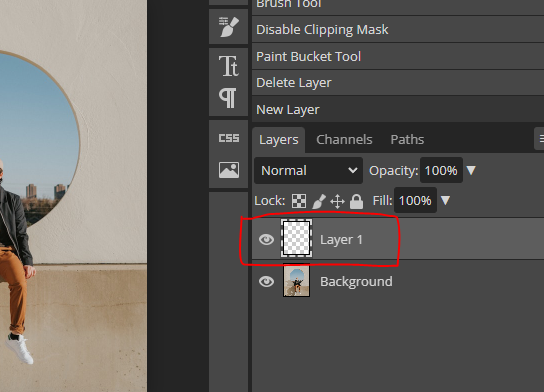
After loading the image, create a new layer by going to the Layer menu on top and go to ‘New’ and select ‘Layer’ option
Under the ‘Layers’ tab a new transparent layer will appear. Click on this layer and now I will use a brush tool to shade the region for inpainting.
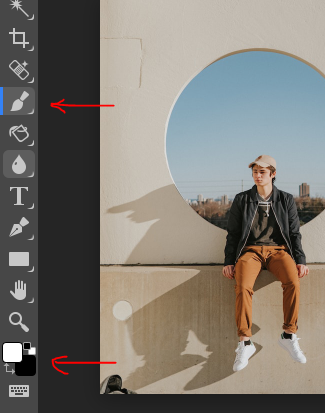
Select the brush tool and the color as white for highlighting region of interest.
As you can see below, I have selected the region in the image.
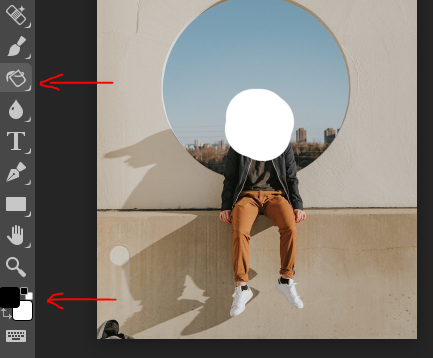
Now select the fill option (bucket icon) and also select black color and click anywhere outside the selected white region to fill the image with black color.
The layer will become black & white and this layer will be used as the mask image for inpainting.
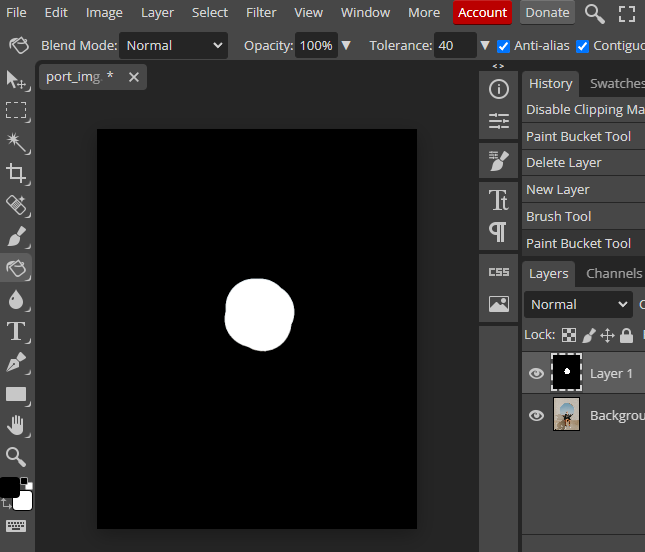
To save this image locally, go to File -> Export As -> JPG
Implement Stable Diffusion Inpainting using Diffusers
We will use Google Colab with GPU enabled to run this code. Feel free to download the Python notebook right away and run the code at your end by clicking the button below.
First let’s install the required packages to implement Stable Diffusion inpainting.
!pip install accelerate
!pip install diffusers
Now we will import the libraries and modules.
import os
import torch
from diffusers import StableDiffusionXLInpaintPipeline
from diffusers.utils import load_image, make_image_grid
Next we will create the SDXL pipeline to perform inpainting. The inpainting Stable Diffusion model will be downloaded from Hugging Face.
model_id = "diffusers/stable-diffusion-xl-1.0-inpainting-0.1"

pipeline = StableDiffusionXLInpaintPipeline.from_pretrained(
    model_id,
    torch_dtype=torch.float16,
)

pipeline = pipeline.to("cuda")
Let’s load the input image and its mask.
# load input RGB image and its mask image
img = load_image("img.jpg")
mask = load_image("mask.jpg")
Now I will use the SDXL pipeline to perform inpainting on the input image based on the mask image and text prompt.
Feel free to change the prompt if needed.
prompt = "human with frog head"

result = pipeline(prompt=prompt,
                 num_inference_steps=30,
                 width = 640,
                 height = 800,
                 image=img,
                 mask_image=mask,
                 guidance_scale=6).images[0]
Make sure you specify the right dimensions of your input image to get best results.
# display images in grid
make_image_grid([img, image], rows = 1, cols = 2)
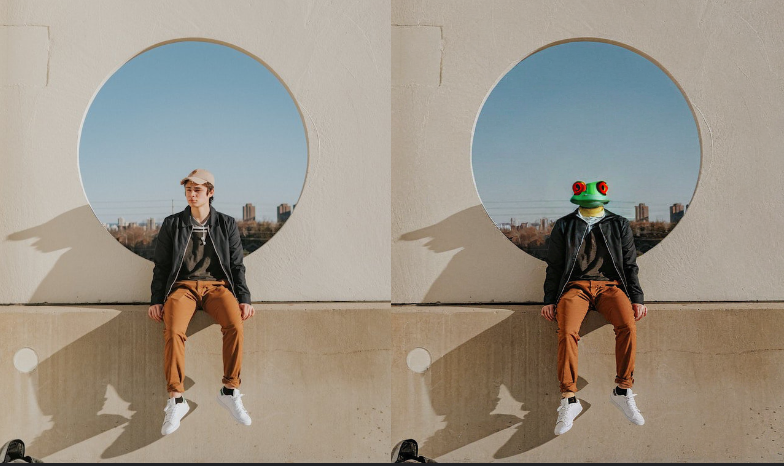
Awesome! The head of the person has been replaced by that of a frog. You can further play around with the parameters of the inpainting pipeline or change the inpainting region to get variety in image generation.
We can also perfrom inpainting using Automatic1111 platform that requires no coding. Check out how to setup Automatic1111 and run on a cloud instance.
Next, I recommend go and check out how outpainting is performed using Stable Diffusion. Feel free to connect with me if you need any help.