In this tutorial, we will use Stable Diffusion, ControlNet and the Diffusers Python library to merge a logo into an AI generated image.
To run Stable Diffusion models you need NVIDIA GPUs and that’s why I will use Google Colab as it provides access to T4 GPUs free of cost.
What is ControlNet?
ControlNet is a deep learning model that helps in achieving controlled image generation through Stable Diffusion models.
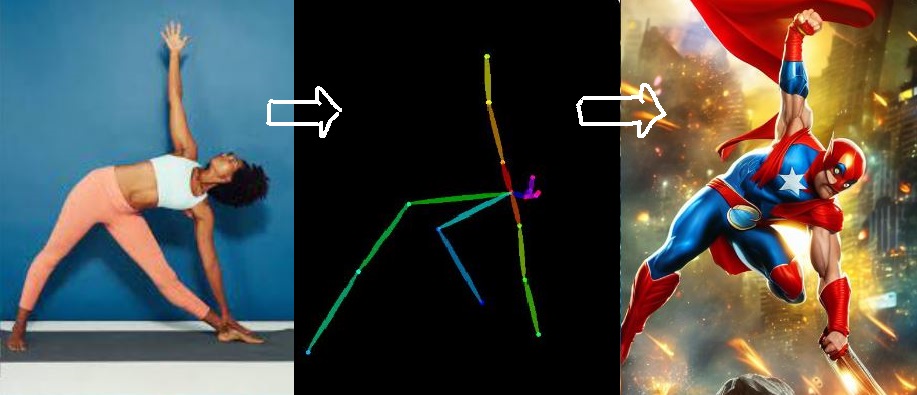
For example, with the help of ControlNet, we can use a pose of a person and use it generate different types of images, we can have a cartoon character or a superhero in the same pose.
In addition to using pose, we can also use other properties of an image in ControlNet to control image generation, such as the depth of the objects, edges in the image, or segmenting the image into different objects.
In this tutorial, ControlNet will be used with Python, but you can also use ControlNet with the no-code tool Automatic1111.
Major libraries used in the code
Apart from the usual libraries like numpy, os, PIL, and matplotlib, we will also use the following libraries:
- torch – 2.1.0
- diffusers – 0.25
- transformers – 4.35.2
Make sure you use the same versions of these libraries or else the code might break for you.
Google Colab comes pre-installed with PyTorch and Transformers libraries, so I will install only Diffusers.
!pip install diffusers==0.25.0
Import packages and models
Let’s import the required modules and libraries for image generation using Stable Diffusion.
import cv2
import torch
import numpy as np
from PIL import Image
import matplotlib.pyplot as plt
from diffusers import StableDiffusionControlNetPipeline, ControlNetModel
from diffusers.utils import make_image_grid
Create a pipeline with the Stable Diffusion model and the ControlNet model. We will be using the Stable Diffusion v1.5 model for this task. You can use other fine-tuned diffusion models as well.
The Diffusers library allows us to easily import both ControlNet and Stable Diffusion models from Hugging Face.
controlnet = ControlNetModel.from_pretrained("lllyasviel/sd-controlnet-canny",  torch_dtype=torch.float16)

pipe = StableDiffusionControlNetPipeline.from_pretrained("runwayml/stable-diffusion-v1-5",
    controlnet=controlnet,
    torch_dtype=torch.float16)

#use GPU
pipe.to("cuda")
Preprocess input image for ControlNet
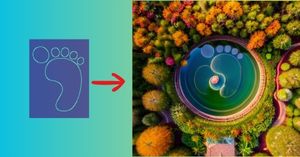
Let’s load the logo image. This is the image that I will merge with the image generated by the stable diffusion model.
# load image
sample_image = Image.open("step.png")

# display image
sample_image
sample_image.size
Output: (150, 250)
The dimensions of the input image are 150 and 250 pixels. So, the height to width ratio is approximately 1.67. While generating the images using the diffusion process, it is advisable to keep similar ratio for the output images as well.
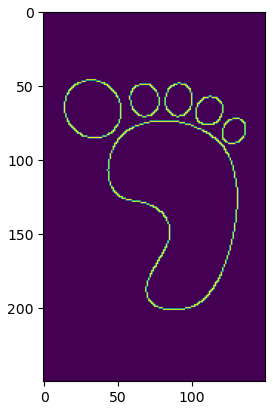
Next step is to apply a canny edge detector on this logo and create a new image highlighting only the edges.
# convert image from PIL format to numpy array
canny_image = np.array(sample_image)

low_threshold = 100
high_threshold = 200

# create image with highlighted edges
canny_image = cv2.Canny(canny_image, low_threshold, high_threshold)

# display image
plt.imshow(canny_image)
Once the image with edges is available, then it should converted back to the PIL format.
# convert image from array to PIL format
canny_image = Image.fromarray(canny_image)
Generate images using Stable Diffusion
Now we will use SD v1.5 and ControlNet models to generate a new image merged with the logo of the input image.
prompt = "((coffee, cake, fruits)), spoons, forks, top angle"

negative_prompt = "(nsfw), monochrome, lowres, painting"

# specify Stable Diffusion pipeline parameters
image = pipe(
    prompt=prompt,
    negative_prompt=negative_prompt,
    width=512,
    height=768,
    image=canny_image,
    guidance_scale=5,
    num_images_per_prompt=1, # number of images to generate
    controlnet_conditioning_scale=0.7, # contribution of controlnet
    num_inference_steps=40,
    generator=torch.manual_seed(311)).images
As you can see, I want the output image in 512 x 768 dimensions. The guidance_scale parameter controls the contribution of the prompts in image generation and controlnet_conditioning_scale parameter controls the contribution of ControlNet canny image model in image generation.
You can play around with these parameters to generate images as per your taste. Let me show you what I have generated.
make_image_grid([canny_image.resize(image[0].size), image[0]], rows = 1, cols = 2)
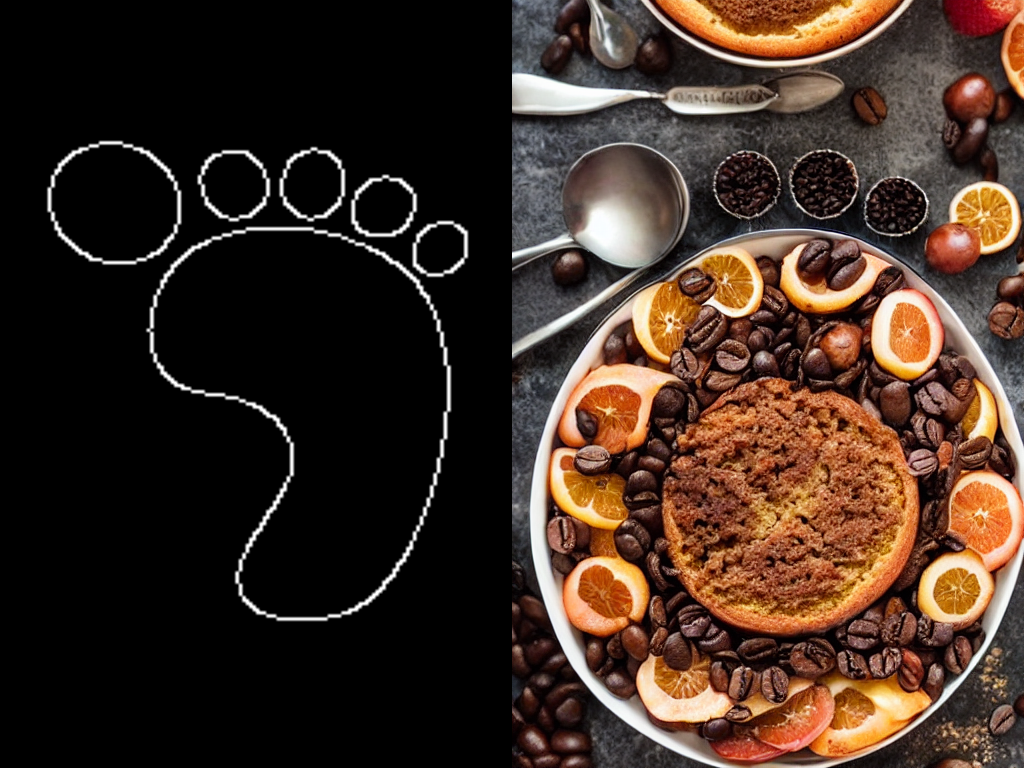
The image on the right is the output of the Stable Diffusion + ControlNet pipeline. The outline of the logo has beautifully blended in the generated image. You can generate similar amazing images and art using this aproach.