
Introduction
Discover how to effortlessly deploy and execute Stable Diffusion models using the user-friendly Automatic1111 web UI on a powerful yet affordable cloud GPU. By following this comprehensive step-by-step guide, you’ll unlock the potential to generate and manipulate images using stable diffusion, all while maintaining budget-friendly operations.
We will use Jarvis Labs to rent a GPU to run stable diffusion on Automatic1111. Jarvis Labs provides cloud GPUs at reasonable rates with the options of on-demand and spot instances.
In my experience, I discovered that Jarvis Labs offers the most affordable GPU options with enough power and VRAM to run Stable Diffusion at a decent speed. On these GPU-instances you can also run other deep learning and Generative AI models like LLM (large language models).
Features of Jarvis Labs
- Curated deep learning environments – Pytorch, Tensorflow and Stable diffusion comes preinstalled. Can Import your own custom frameworks too with the help of Docker.
- No non-sense system set up – Launch your DL instance in < 30 seconds ⏳ and get instant access to Jupyter Lab.
- Easy to manage instances – Pause the instance to persist data and models to resume it later. Scale GPUs and expand storage upon resuming.
- Only pay for what you use – Pay per minute 💰 while the instance is running. Starting from $0.19/hr.
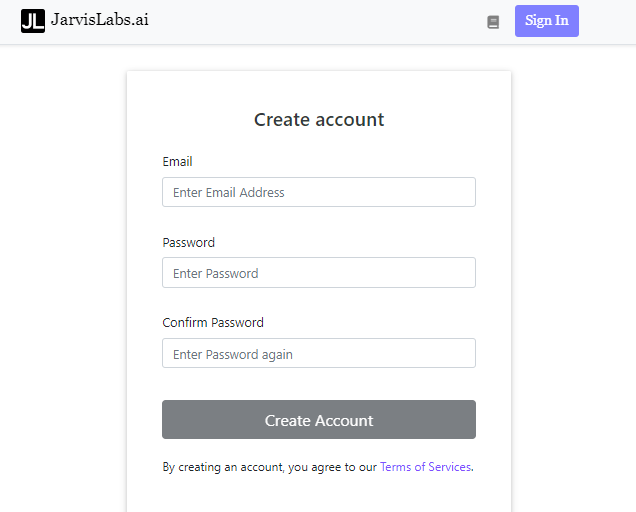
Step 1 – Create Account at Jarvis Labs
Go to cloud.jarvislabs.ai/register and create your account at Jarvis Labs. Once your account is ready, kindly sign in to Jarvis Labs.
Step 2 – Recharge wallet
Once you sign in, an instance creation form will appear on the page. Using this form you have to select the right GPU instance for Stable Diffusion.
Before selecting the instance, first recharge the wallet by clicking on the wallet icon.

Step 3 – Select GPU instance for Stable Diffusion
Once you have recharged your wallet, select Automatic1111 as the ‘Framework’ from the form. Under ‘GPU Type’ field there are multiple GPU offerings, select the one that fits your budget.
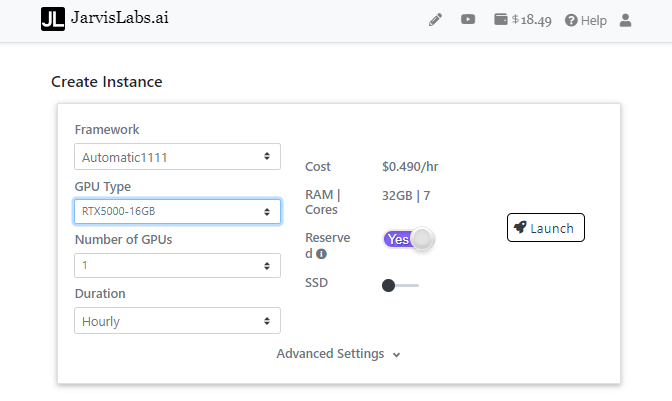
For seamless service, simply activate the ‘Reserved’ option. Disabling it will lower the per-hour cost for the instance, but keep in mind that disconnections may occur intermittently.
Step 4 – Launch Automatic1111 web UI
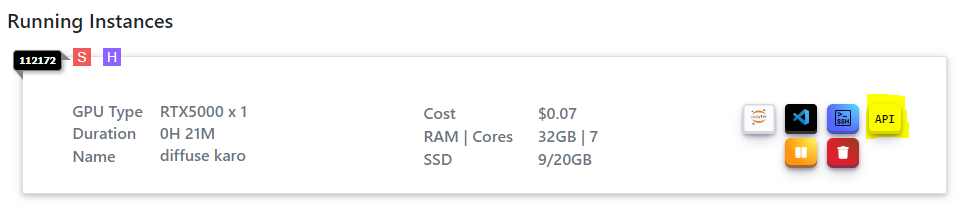
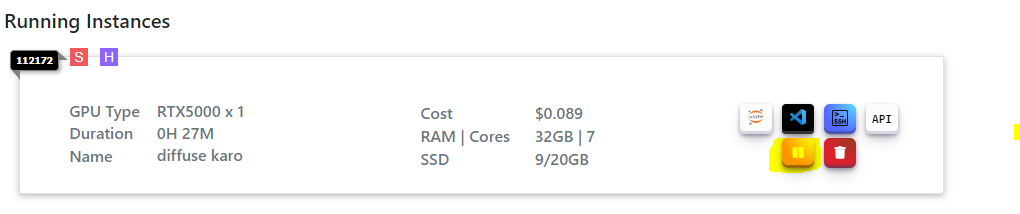
Now click on the Lauch button to start the instance with the specified configuration. A new card would appear on the same page as shown below.

Click on the highlighted icon to open Jupyter Lab.
In Jupyter Lab, click on the Terminal icon to open a terminal.
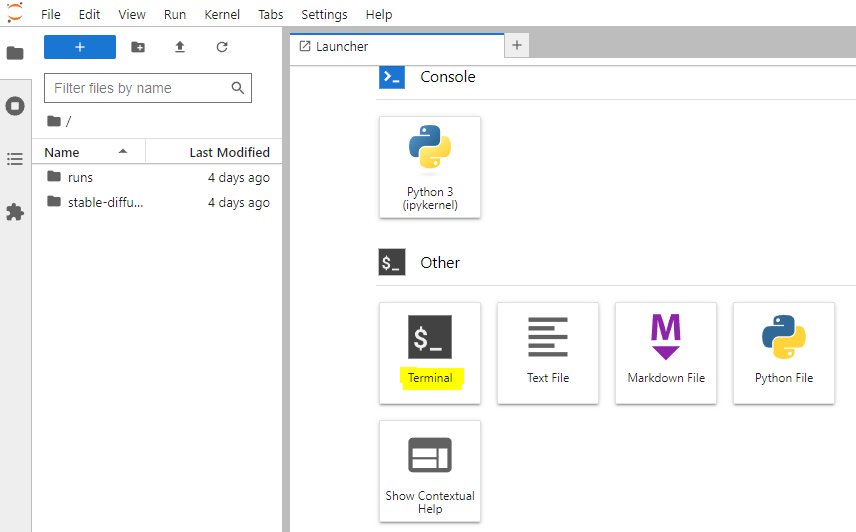
Now in the terminal run the following commands one-by-one:
- cd /home/stable-diffusion-webui/
- python launch.py –xformers –api –subpath=$TOKEN
It will take a few seconds to start the Automatic1111 API that you will use to access the stable diffusion models.

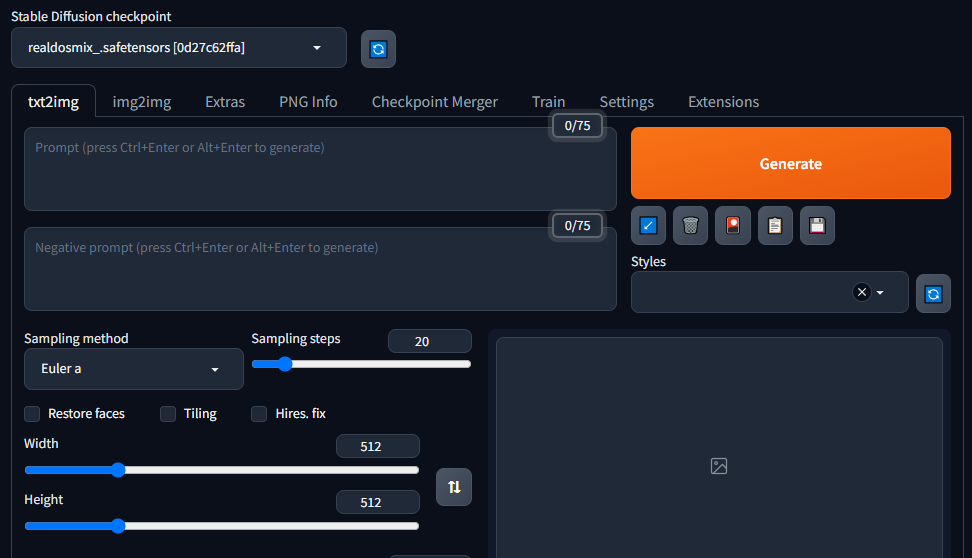
Now go back to the instance page and click on the API icon or button to launch Automatic1111.
Finally we have been able to launch Automatic1111 on an affordable GPU instance, thanks to Jarvis Labs!
Step 5 – Pause Automatic1111 web UI
Once you have used Automatic1111 with Stable Diffusion, you can use the pause button to stop running the instance.
Paused GPU instances won’t cost you anything. However, $0.03/hour will be deducted even for paused instances in Jarvis Labs. So, keep sufficient funds in your wallet.


Thanks for the info. It is very tempting with built-in support for Automatic1111!
You’re welcome!