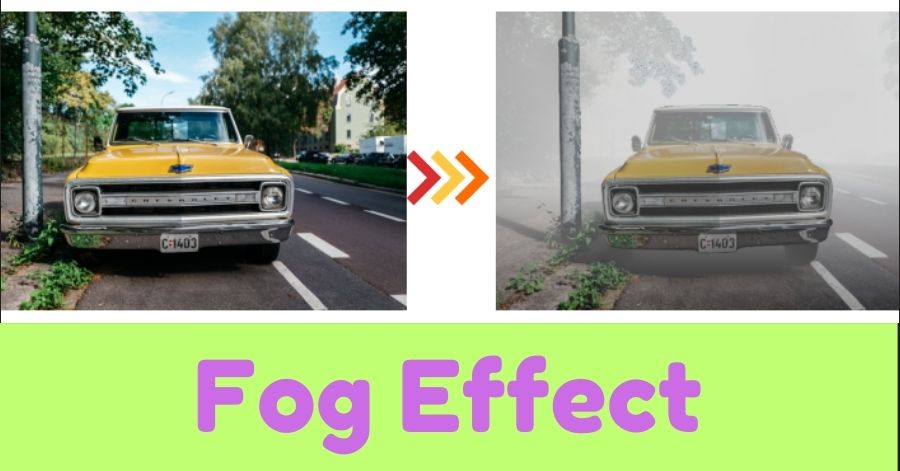
In this tutorial, we’ll explore adding realistic fog or mist to images using Python by combining computer vision models and image manipulation techniques.
I will use libraries like PIL, NumPy, and Hugging Face’s Transformers to simulate fog’s soft, hazy effect in an image. This workflow can be replicated on multiple photos in one go.
Steps to add Fog effect in images
Please refer to the illustration below to gain a basic understanding of the process of adding a fog effect to an image.
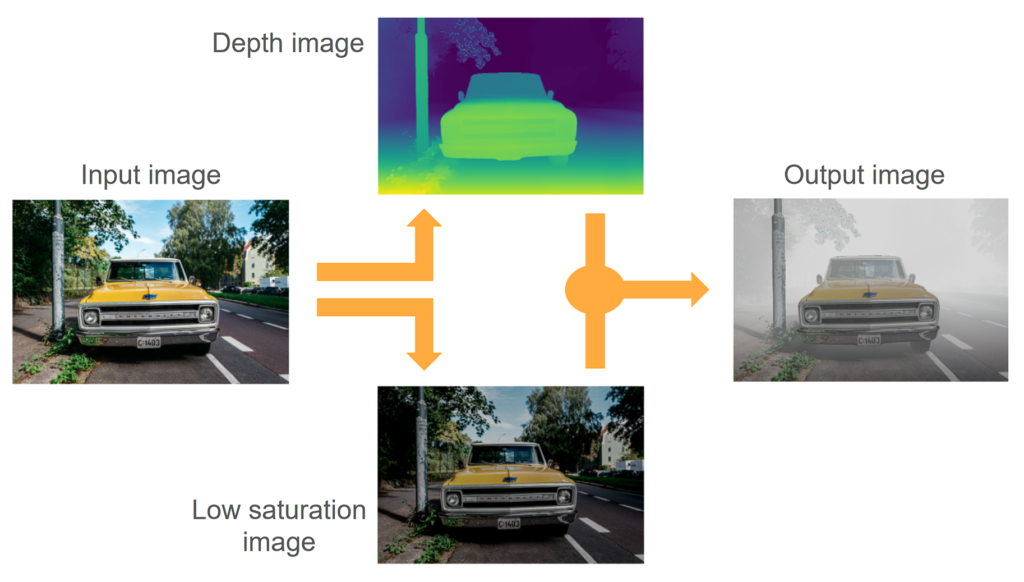
- First, we take an input image with red, green, and blue (RGB) channels.
- Then with the help of a depth estimating model, we have to produce a depth map or image of the input image. This depth image is grayscale. I will use the Depth Anything V2 model to estimate the depth profile of the image.
- In parallel, we can also perform some image enhancement operations on the input image. I’d reduce the colors in the image and also change the brightness and contrast a little bit.
- Finally, a transparent white-colored layer will be added over the enhanced RGB image. The transparency level of each pixel in the white layer will be determined by the corresponding pixel value in the grayscale depth map.
- The white layer with varying transparency will appear like atmospheric fog or mist in the final image.
Create fog in images with Python
Let’s get started with the implementation in Python. I will use Google Colab Notebook to run the Python code. You can also use other online Python environment providers like Kaggle Notebook or Lightning AI Notebook.
Import required Python modules
from PIL import Image, ImageEnhance
import numpy as np
import matplotlib.pyplot as plt
from transformers import pipeline
I will also create a function to display two images side-by-side whenever needed.
def display_images(images = [], rows = 1, cols = 2):

  fig, axes = plt.subplots(rows, cols, figsize=(10, 7))

  # Display images side by side
  axes[0].imshow(images[0])
  axes[0].axis('off')  # Hide axis for image 1

  axes[1].imshow(images[1])
  axes[1].axis('off')  # Hide axis for image 2

  # Show the plot
  plt.show()
Load image and perform depth estimation
Now I’ll load an input image and use the Depth-Anything V2 model to estimate depth in the image.
img = Image.open("city-2.jpg").convert("RGBA")
Note: RGBA means red, green, blue, and alpha channels. The alpha channel represents the transparency layer in the image.
We can use Transformer’s pipeline to import and load the Depth-Anything V2 model as shown below.
pipe = pipeline(task="depth-estimation",
                model="depth-anything/Depth-Anything-V2-Base-hf")
Once the model is loaded, it can be used on the input image and it will generate a grayscale image. The pixels in the output image will be brighter for the nearby objects and will become darker as the distance between the object and the camera increases.
# perform depth estimation
depth = pipe(img)["depth"]

# display images
display_images([img, depth])
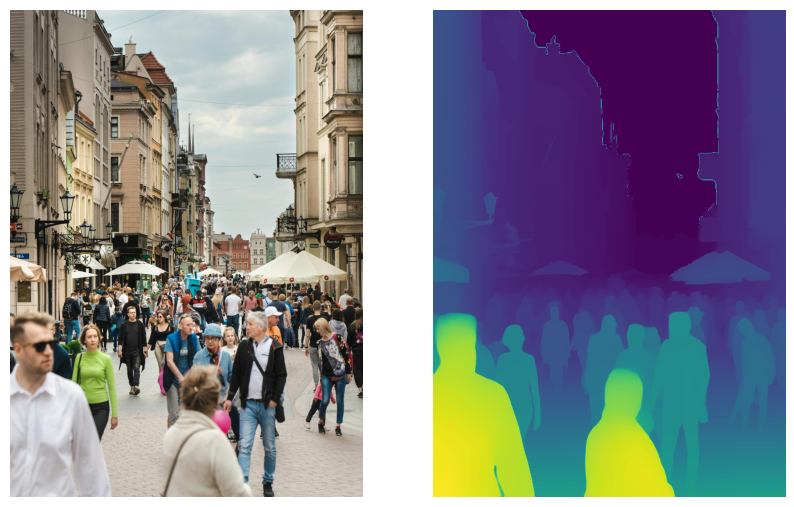
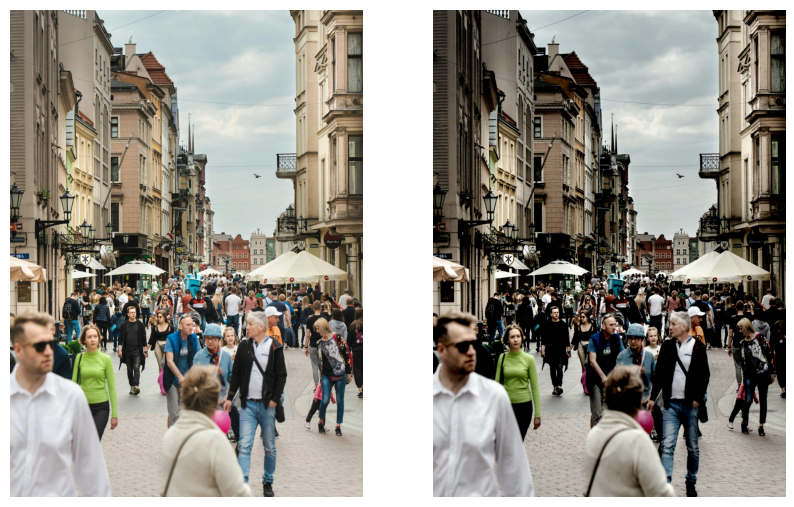
Image color adjustments
Now we can use the PIL library to adjust the colors, brightness, and contrast of the input image to make it look a bit darker and less colorful.
This step is optional and feel free to make adjustments in the image as per your taste.
# reduce saturation
enhancer = ImageEnhance.Color(img)
img_2 = enhancer.enhance(0.5)

# reduce brightness
enhancer2 = ImageEnhance.Brightness(img_2)
img_2 = enhancer2.enhance(0.7)

# increase contrast
enhancer3 = ImageEnhance.Contrast(img_2)
img_2 = enhancer3.enhance(2.2)

display_images([img, img_2])
Add fog to the image
Next, I have created a function that will take the colored image and its depth image as inputs and will generate a new image with an atmospheric fog effect.
def overlay_transparent_layer(rgb_image, grayscale_image):

    # Create a white layer with the same size as the input images
    white_layer = Image.new('RGBA', rgb_image.size, (216,216,216,0))

    # Convert images to numpy arrays for easier manipulation
    rgb_array = np.array(rgb_image)
    grayscale_array = np.array(grayscale_image)
    white_array = np.array(white_layer)

    # Calculate alpha values (invert grayscale values)
    alpha = 255 - grayscale_array

    # Set the alpha channel of the white layer
    white_array[:, :, 3] = alpha

    # Convert back to PIL Image
    white_layer_transparent = Image.fromarray(white_array, 'RGBA')

    # Composite the images
    result = Image.alpha_composite(rgb_image.convert('RGBA'), white_layer_transparent)

    return result
Now let’s pass the input image (after color adjustments) and the depth image to the function above and display the result.
result_img = overlay_transparent_layer(img_2, depth)

# display original image and final output image
display_images([img, result_img])
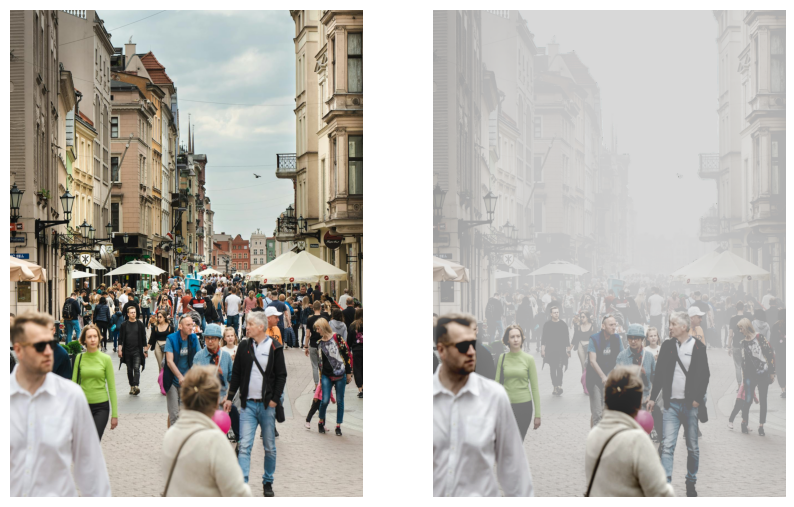
End notes
As you can see, we can add realistic fog in an image by using a few image manipulation tricks in Python. You can also appy this very code on multiple images and produce the same effect in all those images.
This is why I like Python for image analysis as it makes things reproducible and easy to document.