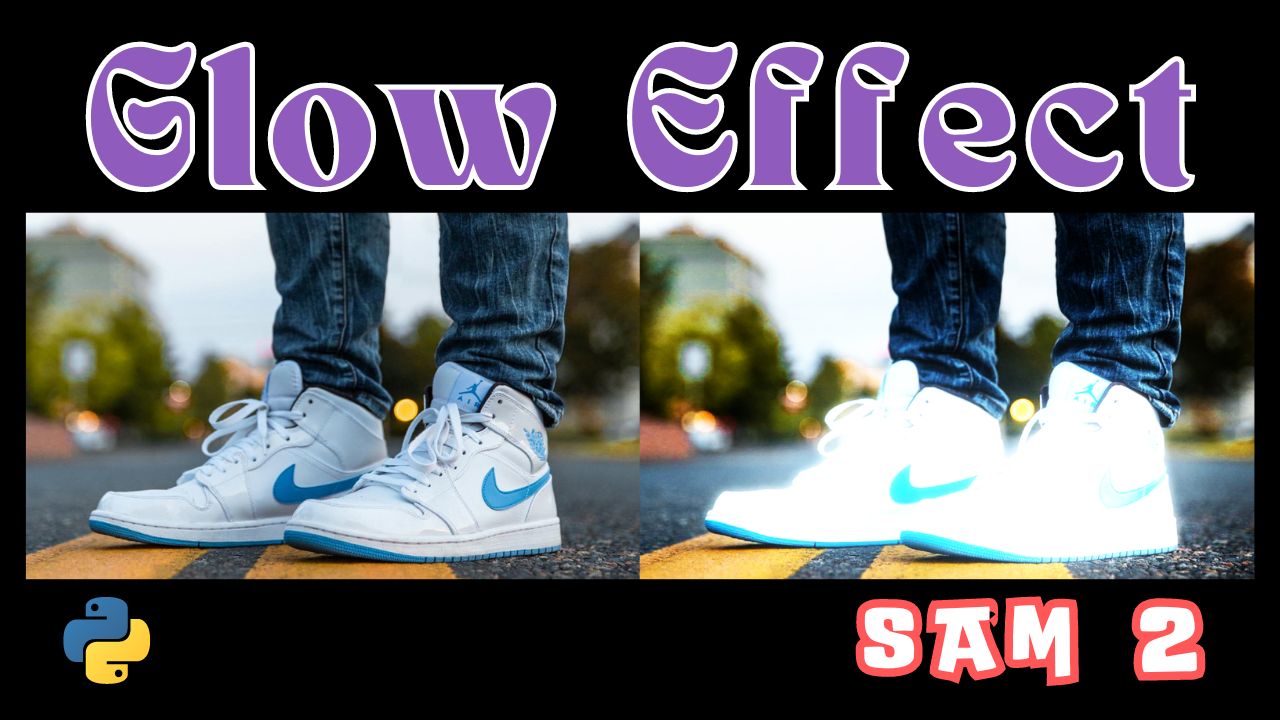
Here is a simple and intuitive method to add a glow effect in images with Python. Using this technique you can make any object glow in your photos.
I will use some image manipulation techniques, image blending modes and Segment-Anything-Model 2 (SAM 2) in this tutorial.
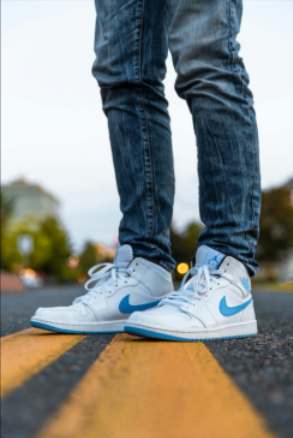
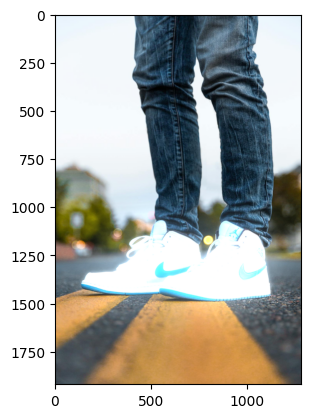
I will work with the following image to make the sneakers glow.
Select object in the image
Here the object of interest is the pair of sneakers. To extract snekers from the input image, I will use Grounded SAM 2 because it allows you to specify the object in the image with a text prompt.
For example, if I want to segment the shoes, I can use a prompt like “shoes” or “sneakers”.
To run Grounded SAM 2, you must enable the GPU. I will use Google Colab notebook with GPU enabled. Once the shoes are extracted from the image, the GPU can be switched off if you wish to save your GPU credits in Colab.
Let’s open the Colab notebook and execute the code below in the same sequence.
# install library
!pip install autodistill-grounded-sam-2
from autodistill_grounded_sam_2 import GroundedSAM2
from autodistill.detection import CaptionOntology

import numpy as np
from PIL import Image, ImageFilter
import matplotlib.pyplot as plt
from scipy.ndimage import binary_dilation
Import image
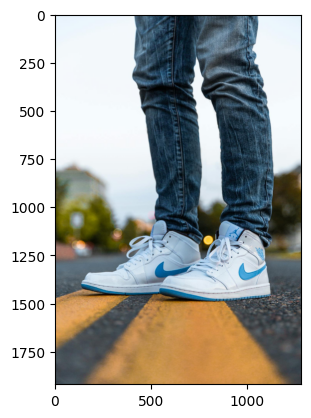
The next step is to import the input image. Make sure the image has been uploaded to the current Colab session.
# load image
img = Image.open("shoes.jpg")

# display image
plt.imshow(img)
plt.show()
Specify prompt for Grounded SAM 2
base_model = GroundedSAM2(
	ontology=CaptionOntology(
    	{
        	"shoes": "shoes"
    	}
	)
)
Perform image segmentation
# image segmentation
results = base_model.predict(img)
The output contains a set of binary mask images for the object of interest. I suggest you plot each mask and then use the mask that best matches your object of interest.
# check number of masks in the output
len(results.mask)
Output: 3
After manual inspection, the first mask was the best for the sneakers. Let me show you the mask image.
# display segmented mask
plt.imshow(results.mask[0], cmap='gray')
plt.show()
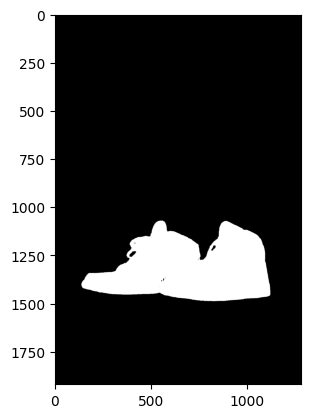
The SAM 2 model has done a great job segmenting the shoes from the input image. You can also use other tools like Adobe Photoshop, MS Paint, or Photopea to perform this type of object selection.
Create and save object mask
Now I will extract the colored pixels from the input image that fall in the white region of the binary mask image.
def apply_mask_to_image(image, mask):
    # Convert the image to a numpy array
    image_array = np.array(image)

    # Create a black background
    black_background = np.zeros_like(image_array)

    # Apply the mask: keep original pixels where mask is True, else use black background
    masked_array = np.where(mask[:, :, np.newaxis], image_array, black_background)

    # Create a new image from the modified array
    return Image.fromarray(masked_array.astype(np.uint8))

selection = apply_mask_to_image(img, results.mask[0])

# display image
plt.imshow(selection)
plt.show()

Let’s save this image and download it to the local system.
selection.save("selection_image.jpg")
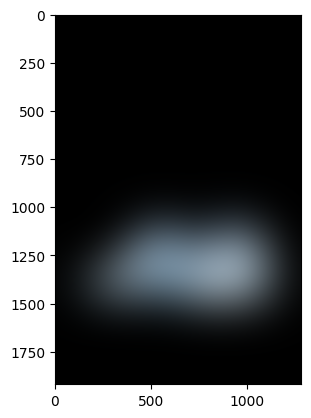
Add Gaussian blur to object mask
Next, I will apply Gaussian blur to the selection image with the help of the ImageFilter function from the PIL library.
# apply blurring
blurred_selection = selection.filter(ImageFilter.GaussianBlur(radius=10))

# display image
plt.imshow(blurred_selection)
plt.show()

I will again apply Gaussian blur to the blurred image with a larger radius of 120.
blurred_selection_2 = blurred_selection.filter(ImageFilter.GaussianBlur(radius=120))

plt.imshow(blurred_selection_2)
plt.show()
Use Linear Dodge blend mode
Now the input image, the first blurred image, and the second blurred image will be combined with the help of Linear Dodge blend mode.
In the Linear Dodge blend mode, the pixel values of the images are added and capped at 255, resulting in a brighter picture.
# Convert both original and blurred images to numpy arrays
original_array = np.array(img).astype(np.float32)
blurred_array = np.array(blurred_selection).astype(np.float32)
blurred_array_2 = np.array(blurred_selection_2).astype(np.float32)

# Perform Linear Dodge blend
blended_array = np.clip(original_array + (blurred_array*0.5) + (blurred_array_2*0.8), 0, 255).astype(np.uint8)

# Create image from the blended array
blended_img = Image.fromarray(blended_array)
As you can see in the code above, I first converted my PIL images into numpy arrays and then applied the Linear Dodge blend.
I have also used 50% and 80% of pixel values of the two blurred images, respectively. It makes the details of the original object slightly more visible through the glow.
Now let’s look at the output.
plt.imshow(blended_img)
plt.show()
Awesome! The glow effect already looks quite good. We can also try to enhance the overall result by slightly darkening the rest of the image.
Enhance glow effect using Overlay blend mode
I will use the Overlay blend mode on the output image (‘blended_array’), which makes dark regions darker and bright regions brighter.
# formula for Overlay Blend mode
blended_array = blended_array / 255

overlay_blended_array = np.where(blended_array < 0.5,
                               2 * blended_array * blended_array,
                               1 - (2 * (1 - blended_array) * (1 - blended_array)))

# Convert back to 8-bit values
overlay_blended_array = (overlay_blended_array * 255).astype(np.uint8)

# Create a new image from the blended array
overlay_blended_img = Image.fromarray(overlay_blended_array)
Now let’s display the output of the Overlay Blend mode along with the input image.
fig, axes = plt.subplots(1, 2, figsize=(10, 7))

# Display images side by side
axes[0].imshow(img)
axes[0].axis('off')

axes[1].imshow(overlay_blended_img)
axes[1].axis('off')

# Show the plot
plt.show()
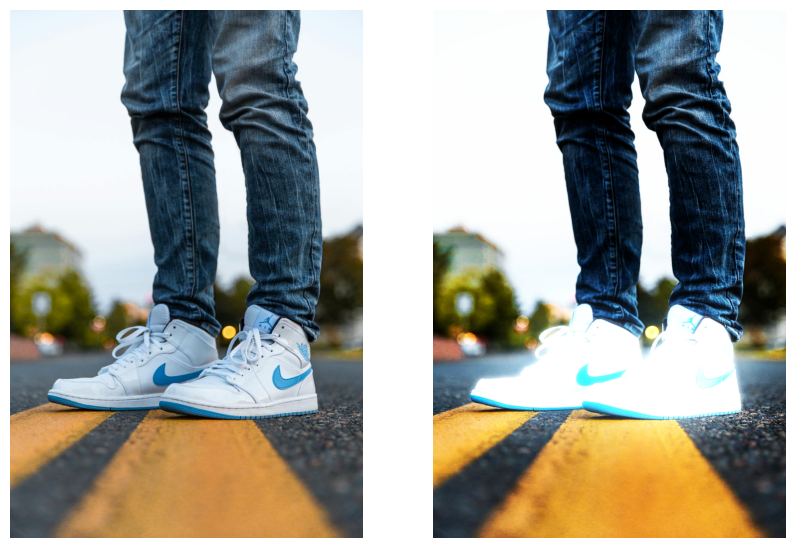
The glow effect in this output image seems to be more noticeable. So, if you want to add a bit of contrast to your Linear Dodge blend mode output then you can use Overlay Blend mode. It will enhance the glow effect.